Showing posts with label Nail Art. Show all posts

December 26, 2013

Winter Break Blogmas Days 4-5: My Family's Weird Christmas Traditions

Day 4 (Beware, Spoilers of Frozen may make an appearance)

Happy Christmas Eve even though it's technically not even Christmas anymore as I write this hahaha...  

Christmas Eve was kind of a relaxing day in the morning until four PM hit and all my aunts/uncles/cousins started arriving at my house for our annual Christmas party.  This year we had hotpot, which is an Asian meal thing where you're just constantly cooking stuff in a single pot.  There's a bunch of uncooked stuff like sliced beef, mushrooms (blech), veggies, seafood, and fish meatballs (THEY'RE SO GOOD) that you can just pop into the pot whenever you want to eat it.  You also mix a bowlful of sauces to dip your food in.  I usually don't really like hotpot, but this time I enjoyed it a lot for reasons I do not know.  Maybe my hotpot maturity has grown or something.  

Two years ago, the adults brought us kids to see The Adventures of TinTin as part of our Christmas present.  This year, we went out together and watched Frozen, as per my request.  And let me just say that this movie was absolutely phenomenal and one my my favorites right now.  I loved it sooooo much, and that is a lot to say for someone who already has her "favorite first three movies" list pretty much etched in stone.  The list, in case you're wondering, goes like this:

1) The Sound of Music (no duhhhh)

2) Tangled (another no duhhhh)

3) Peter Pan (with Jeremy Sumpter, not the cartoon version)   

Ha!  I just realized that all my favorite movies are nice and frilly and have moderately happy endings.  On the other hand, my favorite books are pretty gory and may or may not have all its main characters barely alive in the end.  Just thought I'd point that out.  

Aaanyway, Frozen.  I purposely avoided the trailers and teasers and such before this movie came out because I just knew that I had to go and watch it in theaters.  Not only cause it's a Disney movie, but the creators of Tangled made it!  I really wanted to just go in and see this movie without any prior knowledge of anything, and as a friend suggested, without any expectations.  I feel like I did a pretty good job avoiding all things Frozen cause all I knew was that there was a reindeer and a live snowman called Olaf.  I had no idea that there were in fact TWO princesses, so that surprised me a lot during the first few minutes of the movie.  

My Favorite Things About Frozen
1) Score/Songs: I really loved all of the songs in this movie, and it just reminded me a lot of old Disney movies, which I haven't watched in a while.  It just really brought back good memories when the characters just randomly burst into song, and everything onscreen would just start dancing.  

2) Olaf the Snowman: "Hi, I'm Olaf and I love warm hugs!"  Oh my goodness, I loved this little snowman.  He was just spontaneous and so selfless (I almost cried both times when he started melting), and so EXTREMELY funny.  I mean, you don't get a snowman that actually wants to be in the sun, enjoying the sand and getting a tan.

Source: neptunetwin.com
3) The characters in general: Because this movie was created by the creators of Tangled, I kept my eye out for similarities.  And while it really bothers some people, I found it really exciting when the characters in Frozen resembled the characters in Tangled!  Anna and Elsa totally looked like Rapunzel, while Kristoff and Hans bore slight resemblances of Flynn.  Sven the reindeer behaved a lot like Maximus the horse because they both act like dogs!  One last thing, the kindom was just like Tangled's kingdom, right by the water. 

4) The animation: Most of the movie took place in snow.  Usually, snow is really boring, but the animators made the background so interactive with beautiful snowflakes and Elsa's temporary ice castle.  

5) The moral of the story: I feel like there were multiple morals to this story.  The first was to love and cherish your siblings.  Now, I'm supremely guilty because I'm pretty mean to both of my sisters.  Sometimes I really can't help it because they're quite annoying, but after watching Anna sacrifice everything to try to talk to her sister, I feel like I should try harder to be kind to my own.  I feel like Elsa, who feels like she needs to shut out Anna to protect her, but without the need to protect my sisters.  Another moral was that true love is not only for THE ONE, but also for your own family members.  Yeah, so basically I felt like this movie was telling me to be nice to my younger sisters.  

So there ya go, my take of Frozen.  It was a very, very awesome movie (also cause my dad was appointed the refiller of the popcorn bucket, so us girls didn't miss anything) and I give it an 8.5 out of 10.  

Song of the Day: "Do You Want to Build a Snowman?" from the Frozen Soundtrack

Day 5

So today, my whole family woke up pretty late because we don't have the tradition of opening our presents on Christmas morning!  We actually opened them all last night when our cousins were still over.  

I decided to start a Christmas tradition where we watch a movie (this year was The Sound of Music) on the couch, piled with snacks, pillows, and blankets.  I'm hoping this tradition will stick.  :D

Remember that haul post I did before school started about nail polish?  Well, I also did my nails today with my Sephora nail polish (FINALLY)!  Here's a picture...  I'm quite proud of my work.  

For this manicure, I used the polish called "A Color That Can't Be Tamed" by Sephora by OPI.  It's basically billions of mint green glitter pieces.  It's too thin to go on its own, so I put on a base of white first before I put on the mint green.  I think that the effect is so gorgeous, and it kind of reminds me of winter in a way.   

Song of the Day: "Royals" by Lorde

September 10, 2013

Late Night Rambles

Hi all!  Unfortunately, the school year has started once again.  AP US History, AP English, math, marching band, and a few other sports have pretty much taken over my life.

However, I'm really glad that my youth group has started a one year Bible study together. We all read the assigned chapters everyday and check in on a google doc spreadsheet when we're done.  So far, I've tried really hard to keep it up and I intend to finish the whole Bible by the time I start school again next year.  This has really helped me and kept me accountable of all my quiet times and my relationship with God (it's also brought up some weird questions such as "Why was polygamy allowed in the Old Testament?" and "God was still able to forgive HIM after he did THAT?!").  Last year, I didn't do my quiet times or even read the Bible as much as I should have.  Now, I make sure to do it everyday to go along the the Bible passages.  If you'd like to get started on reading the Bible in a year, the plan is called Eat This Book: One Year Bible with Daily Psalms.  Join me so we can slug through the genealogies together, haha.  

Wow!  I had no idea that I would go off on doing my quiet times everyday, but I just did.  As you probably can tell, I didn't really have a "topic" to blog about today.  (This will probably be the most random post you'll ever read from me.  Ever.)

If you haven't already, please go and check out the Disney Dudez video on my previous blog post.  The video is the most hilariously awesome thing that I've watched, simply because of the boy band, IM5, and the fact that it has the boys playing their own princesses.  My favorite part is the second solo by the guy with the dyed blonde hair in the... red (?) pants. Cinderella's boyfriend.  I just love the funky tune and how he sings it.  Heart.  Melting.

I hear that they might be doing another collab type thing with the director of the video, Todrick Hall (the janitor that does these awesome random appearances during the video).  I'm definitely gonna keep an eye out for that.  
 
And while we're talking about IM5, let me just mention their new song, Superman.  It was co-written by Dalton (heart melting blondie) and Will (heart melting Asian).  The first time I heard it, I wasn't sure who wrote it, but it turned out to be two of the guys in the band!  I was super impressed because...

a) boybands usually don't write their own songs and 

b) IM5 sounded really good when they sang it live (usually songs are auto tuned to the max, ugh).  

So here is the video if you'd like to take a listen...


Last thing: I RECEIVED MY NAIL POLISHES FROM SEPHORA!  Yay!  They are all very gorgeous in their own ways, though I wish that I'd opted for a couple of other colors instead.  In case you missed the Pre-Haul post, I'll link it right here...  I'll try to do a post soon about the polishes, but I can't really promise anything, seeing that I haven't blogged since school started.

Hopefully I'll be back soon with legit stuff to blog about instead of random videos (even though they are awesome) from YouTube.  :) 

August 5, 2013

Pre-Haul: Sephora by OPI Nail Polish!

This morning, I bought a bunch of nail polishes from the Sephora website!  Normally I don't go on shopping splurges like this, but since I earned some money from working this summer, I decided to reward myself.  

It also helped that there was a sale: 3 NAIL POLISHES FOR ONLY 10 DOLLARS!!!!!!!!  Can you believe it?!  Normally the polishes cost about 8 dollars at the least, please correct me if I'm wrong.  But that was truly a bargain.

Another plus: Three free samples (you can choose out of nine) WITH ANY PURCHASE!  I fully took advantage of that.  

Here are the polishes I bought...


1.  212-Sephora:  I loved all the little specks of different colors and thought it would look really great layered on top of black.  Or maybe it'll work in a bunch of layers on its own... We'll see!


2.  Mermaid to Order:  The shiny iridescence really appealed to me for some reason.  I guess the name of the polish also made me really want to get this.  I'm obsessed with the Little Mermaid.  :D


3.  Bright as a Feather:  I've always wanted a pale, eggshell blue color.  


4.  What's a Tire Jack?:  I've actually never owned a black nail polish.  And I feel like black is a very important staple to a nail polish owner, especially if you like nail art.  


5.  Casanova Is So Into Me:  I've also never owned a pink either!  I borrowed my sister's pink nail polishes for my blog posts.  Now she'll be the one begging me for polish hehehe...


6.  A Color That Can't Be Tamed:  The description said it was a "mint green with fine holographic glitter".  I thought that was pretty cool.  It also reminds me of my favorite ice cream flavor, mint chocolate chip.  

For these 6 nail polishes, it was only 20 dollars!  Not plus tax or shipping, of course.  But either way, I'm excited for my nail polishes ( and free samples) to come in the mail!  It will be the bright point of my one and a half weeks of band/drumline camp.  

Thanks for reading and go claim your 3 for $10 polishes right here.  

*Sorry for the weird gaps under pictures if there are any. 

May 30, 2013

CARTOON NAILS?! (a cutepolish design)

Happy Thursday, everyone!  Today, I have a nail art design that I've been dying to share with you all.  I first saw it on cutepolish's channel on YouTube.  It's so simple, and as long as you have black and white stripers, you're set!  

I used my pink nail polish from my blog post, "Happy Resurrection Sunday".  I also used the a fore-mentioned black and white stripers from Kiss Nail Artist: Paint and Stencil Kit.  

My Steps: 

1) Apply your base coat!  

2) Apply the pink (or any other solid color that you prefer).

3) Take the black striper and outline your entire nail.  Don't make the lines too thick!  The width of the striper should be a guide to the width of the lines.  

4) Use your white striper and make an upside down exclamation mark on one side of your nail.  Paint this right next to one of your black outlines.  

5) Cover it all with a top coat!  


So..  It should turn out something like this (cutepolish's nails were SO much better than mine.  Check her video out at the end of the post!)


I think that this design is an illusion in itself; tons of people were asking me if my nails were real!  Sometimes, I felt like I was a cartoon character or something.  This is a very fun design, and I hope you'll try it out sometime.  Thanks for reading!

P.S. Here is cutepolish's video if you'd like to see how she did her nails!  Give it a thumbs up if you liked!


March 31, 2013

Happy Resurrection Sunday!

Okay, so you're probably wondering why I called this post "Happy RESURRECTION Day" instead of "Happy Easter" or something of the like.  Today after the church service, I was sitting with my friends, talking, and eating lunch.  A couple friends were discussing the fact that when people think of Easter, all that comes to mind are chocolate bunnies, eggs, and dye.  My friends also brought up the fact that Easter Sunday was actually originally a pagan holiday for Ishtar, goddess of fertility.  I was like, "What?  Huh?  Easter celebrates Jesus coming back to life after 3 days in the tomb!!"  But it turns out that priests in Babylon sacrificed babies to this goddess on Easter.  The Easter eggs that we like to hunt is a representation of good fertility or whatever.  Ugh.  Totally not what I thought Easter originated from.  So after this whole discussion that I was kind of eavesdropping/participating in, I decided that I'd rather call this beloved Christian holiday, Resurrection Sunday.  And also cause, you know, Easter kind of sounds like Ishtar.  

Before you go all over me for being an Easter-hater, I'll tell you that I don't hate Easter at all!  Every time I think about how Jesus died for us and took the nails, the lashes of whips, and the abuse for us, I'm just so grateful.  He did it out of love for us.  I'm also really amazed at how someone could love us so much that He would give his life for us.  I'd just rather think about this holiday as the resurrection of Jesus Christ, not a day about the Easter bunny, candy, and colorful eggs.  The candy and egg hunts are a plus, I suppose, just not the most important thing about Resurrection Sunday.   

Moving on!  If you didn't catch the post, I gave up secular music for Lent this year.  My first year giving something up for Lent, actually.  I saw this as a chance to focus my heart on God and took it!  Some of you may be wondering how the Lent thing went.  At first, it was sooooo hard for me not to sing secular songs in the shower (ILOVESINGINGINTHESHOWER).  Every time I'd think of a song and wanted to belt it out, but then I had to think twice before I did.  Other times I just got so sick of listening to Christian music and nothing else.  Also, I'm the kind of person that thinks of a song and the song gets stuck in my head FOREVER.  I found myself singing "Jesus Loves Me" loudly multiple times.  It was really effective though!  Some other difficulties were surprising ones that I never would have thought of and could not really help.  In gym class, the teachers started playing secular songs while we were playing volleyball.  When I went to the mall, every store was blasting some well known artist.  In band class, we obviously didn't play any Hillsong United (haha, I'd like to see that happen), so that was an exception.

Overall, I think it was a very, very good break from secular music for me.  I discovered that listening to secular music a lot made me discontent.  However, with more than a month of listening to music that was specifically created to praise God made my mood lighter and I am more grateful for what I have.  Right now, I could turn on my iPod or Spotify and listen to some Cimorelli or Birdy or whatever else there is.  But I just don't have that hunger for secular music anymore!

One last thing before I go!  It's really cold right now where I live, and it's only just starting to warm up again.  Since spring obviously can't come at the moment, I thought I'd just try to liven up the place with some colorful nail polish.  Here is Pinkalicious by Maybelline Color Show.  I absolutely adore the color and I think it looks very flattering with gold or silver rings.  *I apologize for the dull-looking appearance (it had been several days since I applied the polish) and my ungroomed cuticles.*


I hope you've all been having a glorious Sunday remembering the resurrection of our Lord Jesus Christ!  HE IS RISEN!!!!!


March 28, 2013

Winter Manicures: Purple Glitter

Okay!  Here's the long awaited nail design.  It's probably not even a design because it's just layering two beautiful nail polishes.  


What I Used...
#'s 1-3, left to right

1) Light pastel-ish purple nail polish

2) Revlons's Multi Care Base + Top Coat

3) Sally Hansen's Hard As Nails Top Coat

4) Forever 21's Love Nails: Purple/Multi glitter nail polish 


the glitter polish, #4
The Simple Steps I Took...

1) Apply the base coat.

2) Apply the pastel purple.  Make sure that this color is more neutral than bold, because the bolder polishes and glitter polish clash mightily.   Also make sure that the pastel color is even all the way across the nail.

3) Apply your Forever 21 purple glitter nail polish!  Be sure that the glitter is even all over the nail too; you can lightly patch it up if you see a spot with less glitter.  However, don't go all out with the glitter because your beautiful pastel will be hidden and it looks kind of bad.  2 swipes of the brush max!
glitter blending...

4) And always remember the top coat.  I used to never use a top coat, and as a result, my nail polish would chip easily.  Sally Hansen's Hard As Nails top coat is very effective; I definitely recommend it!


I don't really think that you guys needed the steps, but you know, just in case.  :)

I really appreciate the friend that lent me the gorgeous glitter nail polish (I forgot to return it to her until two weeks later, haha sorry)!  It's very cool because the small glitter pieces are actually pink and blue.  When they're combined, they radiate purple!  Very cool, very cool.  Anyway, good luck!

February 22, 2013

How to Grow Healthy Nails! Brought to us by JustLoves Fashion

Good afternoon!  So unfortunately, there wasn't a snow day today, and I still had to go to school.  :(  Synchronized swimming was quite the disaster, as was math class.  I had to squeeze my eyelids periodically to keep myself awake.  

On a brighter note, here is a video on how to grow and keep your nails healthy!  I found this video quite helpful because my nails are not in the best shape.  They're starting to peel a lot more than last year.

This video was made by a YouTube beauty guru, JustLovesFashion aka Britt.  She originates from England and has a cool British accent (I LOVE British accents, wanted one since I read/watched/listened to Narnia when I was younger).  Britt does a lot of stuff about makeup and random beauty TAGs.  Even though I very rarely use makeup, I follow her on YouTube because she does pretty nail stuff.  Hope you found the video helpful!


January 23, 2013

Winter Manicures: Gradient Nails! (A cutepolish Design)

Time for a new nail polish design!  I was browsing cutepolish's YouTube channel when I came across this elegant but easy design.  I knew I had to try it out even though the video was called "Prom Nails".  I've also added the video on this post, so my advice to you is: 
1) Watch the video.  
2) Read my steps. 
3) Try the design by mixing the cutepolish's and my advice/steps together.
4) Like the video.
5) Share my post.  :)

Enough of the ramble...  Here it is!


A different lighting, taken at night.

I USED... 
*All of these polishes can be changed/altered to your liking.  Obviously.*

~Sally Hansen, Advanced Hard as Nails: Strengthening Top Coat
~Revlon, Multi Care Base + Top Coat (965)
~A light purple polish.  I don't really know what brand it is, because it's all written in Japanese.  I can't read that...  Anyways, any color will do for this design.  Except for very dark ones. 
~claire's cosmetics, sparkly nail polish, tinted rose-ish


STEPS I TOOK AFTER WATCHING THE VIDEO

1.  Apply your base coat!  You might want to do it several times.

2.  Take the color that you want to use (mine was the light purple) for this design and wipe as much paint as you can off on the side of the bottle.  Your brush should NOT be laden with paint.

3.  Apply whatever is left on the brush about three quarters of the way down your nail.  Everything besides the bottom portion of your nail should look like a terrible nail job.  It's your choice if you want to leave the bottom quarter uncolored.  I chose to dab a little bit of paint all the way down because I have shorter nails.  LET EVERYTHING DRY.

4.  Do step 2 again, but this time, leave a little bit more paint on the brush.  

5.  Apply the paint halfway down your nail this time.  LET EVERYTHING DRY.

6.  Gather a regular amount of nail polish on your brush and apply it to the very tip, or the top fourth of your nail.  LET EVERYTHING DRY.  

7.  Sparkle time!  Apply the sparkly nail polish (any will do, as long as it has larger sparkly pieces and the glitter isn't multicolored) on all of your gradiented nails.  This sparkle layer will kind of distort the chunky layers of color underneath and make them all blend together!

8.  And as always, a top coat will seal the deal.   

*Warnings/Tips* 
-does not work well with dark colors unless you're very, very experienced/ambidextrous.  Ugh.  I had to find out the hard way.
-work on all your nails on the same step.  In other words... do one step on all of your fingers and let it dry completely.  Starting and finishing one hand and then going on to the next makes the layers uneven (again, unless you are ambidextrous).   
-I feel like this would look really good during the winter in an eggshell blue.  Just a thought.  :D

I really really really liked doing this design.  It was beautiful and very easy.  Thank you, cutepolish!   Remember to check out cutepolish's YouTube channel for more original designs.  Thank you all so much for reading and have fun!

December 22, 2012

Winter Manicures: Sparkles and Blue Ice

Sparkles and Blue Ice
Hello!  I thought it would be fun to start off the winter season with an original nail design.  My nail polish collection is a little limited, so I had to be a little creative with what I have!  And I have to say, the results were pretty cool.  I call this design Sparkles in Blue Ice because it is exactly that.  I'm not very good at naming things (or people for that matter), so if you have a better name for this, let me know!

Sparkles and Blue Ice


Revlon: Multi Care 965
Sinful Colors: Love Nails 282
 I USED...
-Claire's Cosmetics nail polish: this one didn't really have a name.  It was mainly just sparkles with a slight blue tint.  However, any sparkly polish will do the job.  


Sinful Colors: Snow Me White 101
Claire's: Sparkly Blue
-Sinful Colors: Snow Me White (White)

-Sinful Colors: Love Nails (Blue with a shiny incandescence)

-Revlon: Multi-Care base and top coat 

MY STEPS...
1.  Spread your base coat evenly on all of your clean, dry nails.
2.  Put on your white polish and make sure it is even.  This will be the supporting base for your blue.
3.  Paint the SHINY blue on all of your nails.  It doesn't need to be very even, since the white will show through and make it icy-like.  Because you have a white base, you only need to paint the blue on once.
4.  Take your sparkly polish and apply it lightly.  It doesn't need to be very thick unless you didn't have a SHINY blue nail polish.  
5.  Finish everything off with a nice liberal coat of your top coat.  Make sure to cover every millimeter of you nail so that your blue doesn't start to rub off in only a couple of days like it did with mine! 

Here is my thumb as an end result. 
I hope you liked the design.  Please let me know how it goes for you if you try it!  And if you decide to copy any pictures, give credit where it's due.  Thanks for reading!

December 1, 2012

Strawberry Ice and Nail Designs

Hello everybody!  I'm here to post some pictures from when I went to California last month.  By the way, southern California (Irvine, Los Angeles, places around there) is a pretty great place to get really really really good Asian food.  I recommend a place who's specialty is Taiwanese food, Class 302.  :)

These pictures really don't have much to do with anything I did in California (I really went for a wedding), but I really like them and thought I'd share them with you.  I especially like how clear the detail is because I used the "macro" setting to take the close-ups. 


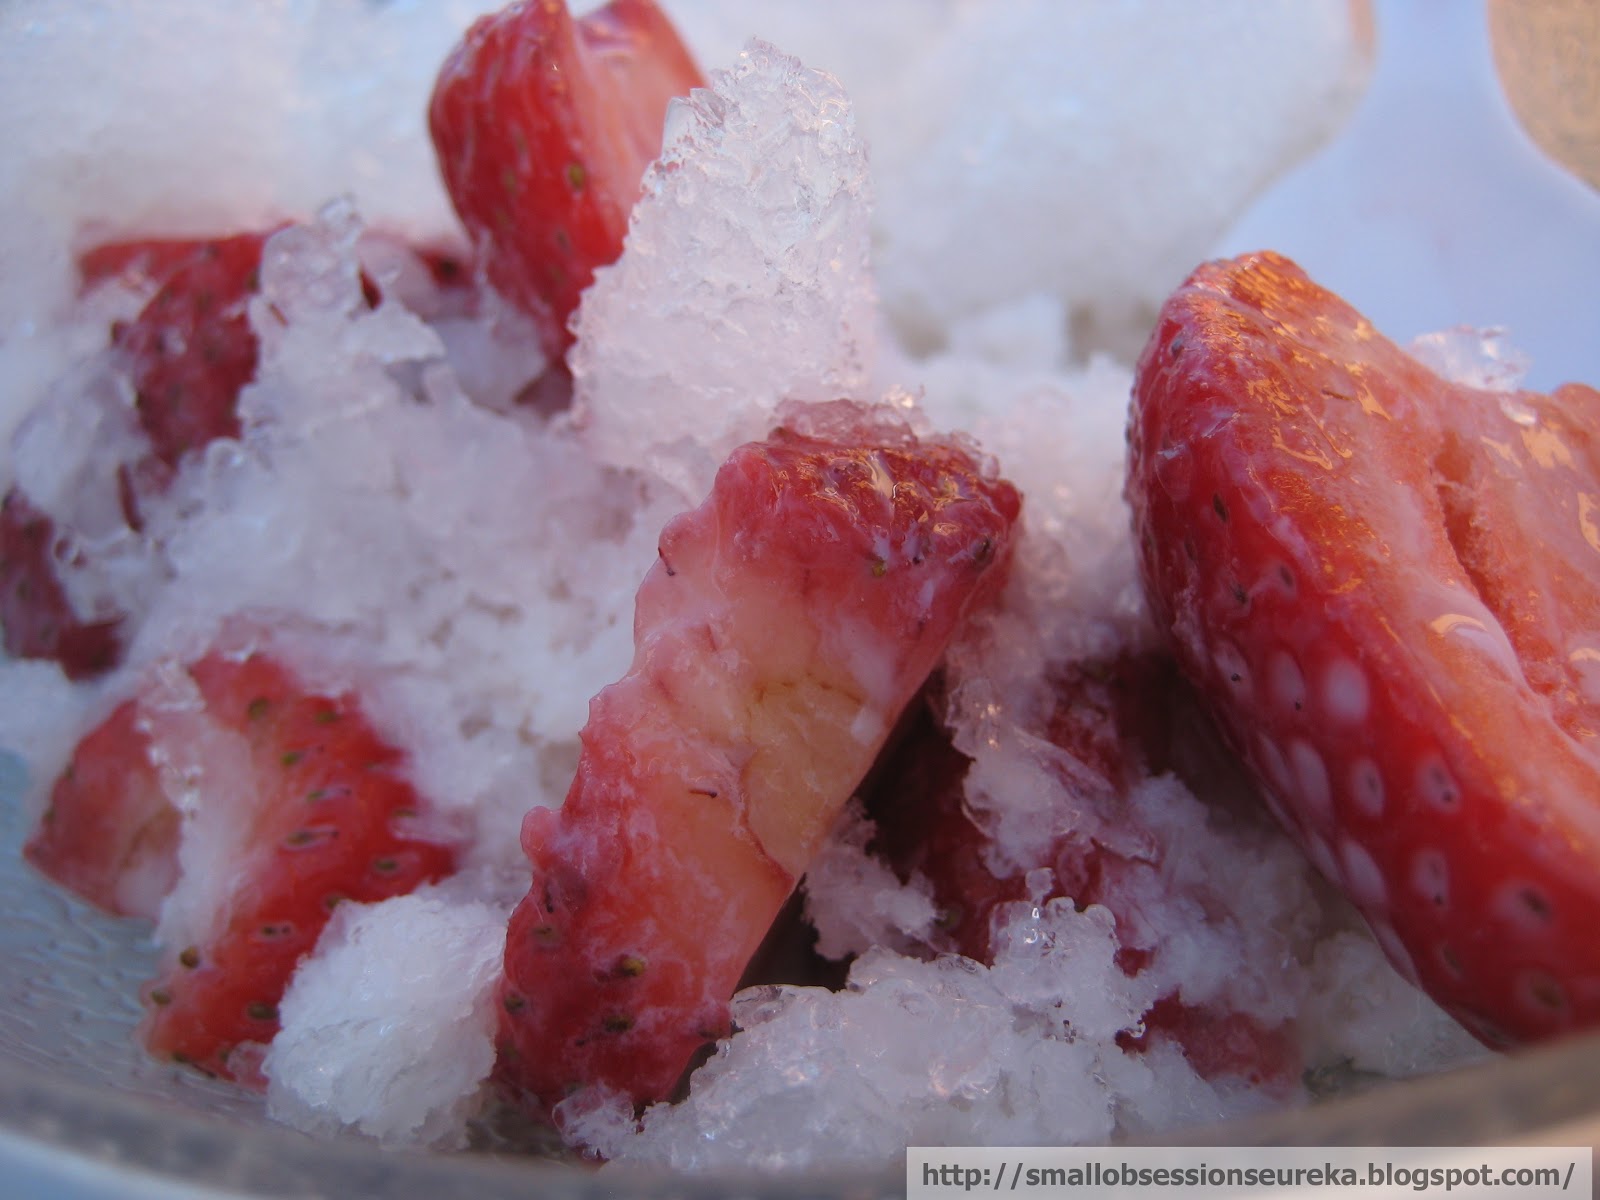
Pictures #1 & 2:  Strawberry Shaved Ice!  I had this on the last day I was in California, and we ate this outside in the bright sun.  For those in the Midwest and other places that are already super cold by October, it was in the 80's!  The only thing I would have added was some chocolate drizzle for the strawberries.  I'm a lover of chocolate-covered strawberries!  Gosh...  These pictures make my mouth water even now!


Pictures #3 & 4:  Yes, these are my wonderfully beautiful fingers and sleek blue iPod!  Haha, just kidding.  A couple of nights before I took these pictures, I was visiting with old friends I hadn't seen in a while.  We ended up doing our nails because one of us brought her whole collection of nail polish.  It was fun and my nails matched the dress that I was wearing for the wedding.  I've got to say, my photography is better than my nail job.  My nails were completely perfect the first night and then I chipped and nicked them all over.  I might have even bitten one of them in my sleep, which is very strange.  Oh well...   


Pictures #5 & 6:  Once again, my fingers are the stars of the show!  I actually did my nails again a week and a half ago.  If you can see the purple underneath the silver crackle, that was my original color for my nails.  Then, being the wonderfully clumsy person I am, I managed to mess them up in one hour.  I feel quite accomplished though, since I had the brains to cover it up with crackle.  :)  And in the second picture, I'm holding these AMAZING Japanese pens called Frixion Point.  I love them immensely because they're erasable!  I don't even mean leave-streaks-of-color erasable.  They're really really erasable!  But...  I think they're only sold in Japan. 


Picture #7:  This picture should probably go along with 3 & 4.  The e-ma circle thing is actually a box for candy.  And once again, it's Japanese!  It's probably my favorite Asian brand of candy.  They're little pearls of sweet tartness that are available in different flavors.  Wow, now I sound like I'm doing sales!  Point of the story, try them out!

I hope you all enjoyed the pictures I shared with you.  If you want to copy them for any reason, please give credit where it's due!  Thank you so much for reading!

September 8, 2012

Nail Art With TAPE

Tape nail art!  (Source: makeup.com)
Another cool manicure to add to the list!  I was looking through a magazine, and it was so easy and cool that I just had to try it.  I did this nail design a while ago, and it took me about half an hour because the nail polish wouldn't dry.  But overall, it was quite easy and very attractive.  

More tape nail art!  (Source: polishyoupretty.com)
All you need is a few colors of nail polish (ones that compliment each other of course), masking or scotch tape (NO DUCT TAPE, it will peel your polish off), and a whole lot of patience.  

Step 1)  Choose a base color for your nails.  You might want the lighter color to be the base, in case the darker color won't let the light one show.

Visual of step three  (Source: shine.yahoo.com)
Step 2)  Wait patiently for the base to dry.  Seriously!  I beg you!  The whole design will be ruined if you don't let it dry ALL THE WAY. 

Step 3)  Take pieces of tape (thick and thin triangles, circles, simple strips) and stick them randomly over the dried base coat.  Make sure that they're easy to peel off, though!  The great thing about this is that you can experiment with shapes and make your own signature design!

Step 4)  Take your other polish color and paint over your nails, tape and all.  Make sure to get all those little nooks and crannies!

Step 5)  Another long wait for the polish to dry...

Step 6)  Peel off the tape and admire your amazing design before you seal it up with some clear nail polish.  Then admire it some more!

Thank you for reading and I hope you enjoy making your own taped nails!  

August 11, 2012

Straw Nail Art

Hello everyone!  Sorry I haven't posted for a while...  I've been a bit busy getting ready for school.  

Anyways, one of my best friends showed me this very cool design for your nails.  It looks like this:  

Nail art with straws: white base   (Source: thedailyvarnish.com)
Nail art with straws: black base   (Source: spektorsnails.blogspot.com)
Doesn't it look so cool?  Well guess what?  It's also really easy to do!  

All you need is a straw (a thin one), a base color (preferably a color that will not overpower your other colors), and a couple of other colors of nail polish.  The design is as easy as it looks.  Just paint your nails with your base color, wait for them to dry, put a little bit of color on the end of your straw, and stamp it on your nails.  Wait for that to dry and cover the design with clear nail polish.  

I did this a couple of weeks a ago and it only took me twenty minutes tops.  I would've taken a picture of my own nails, but they're already chipping away.  The first picture up above looks almost exactly like my nails because I also used red and blue on top of white.  The only difference is that I didn't stamp the colors so many times.  Too many circles would be a little too overpowering.

If you have any questions, please email me at: chrispytai@gmail.com.  Have fun with the design!